这周又要过一半了……

0x00.前言

腾讯云开发者实验室(beta),这个其实很早就看见了,还加了QQ群,不过当时以为只是第一次免费,所以一直没做,昨天发现可以无限次做……
0x01.引用

1.0 简介

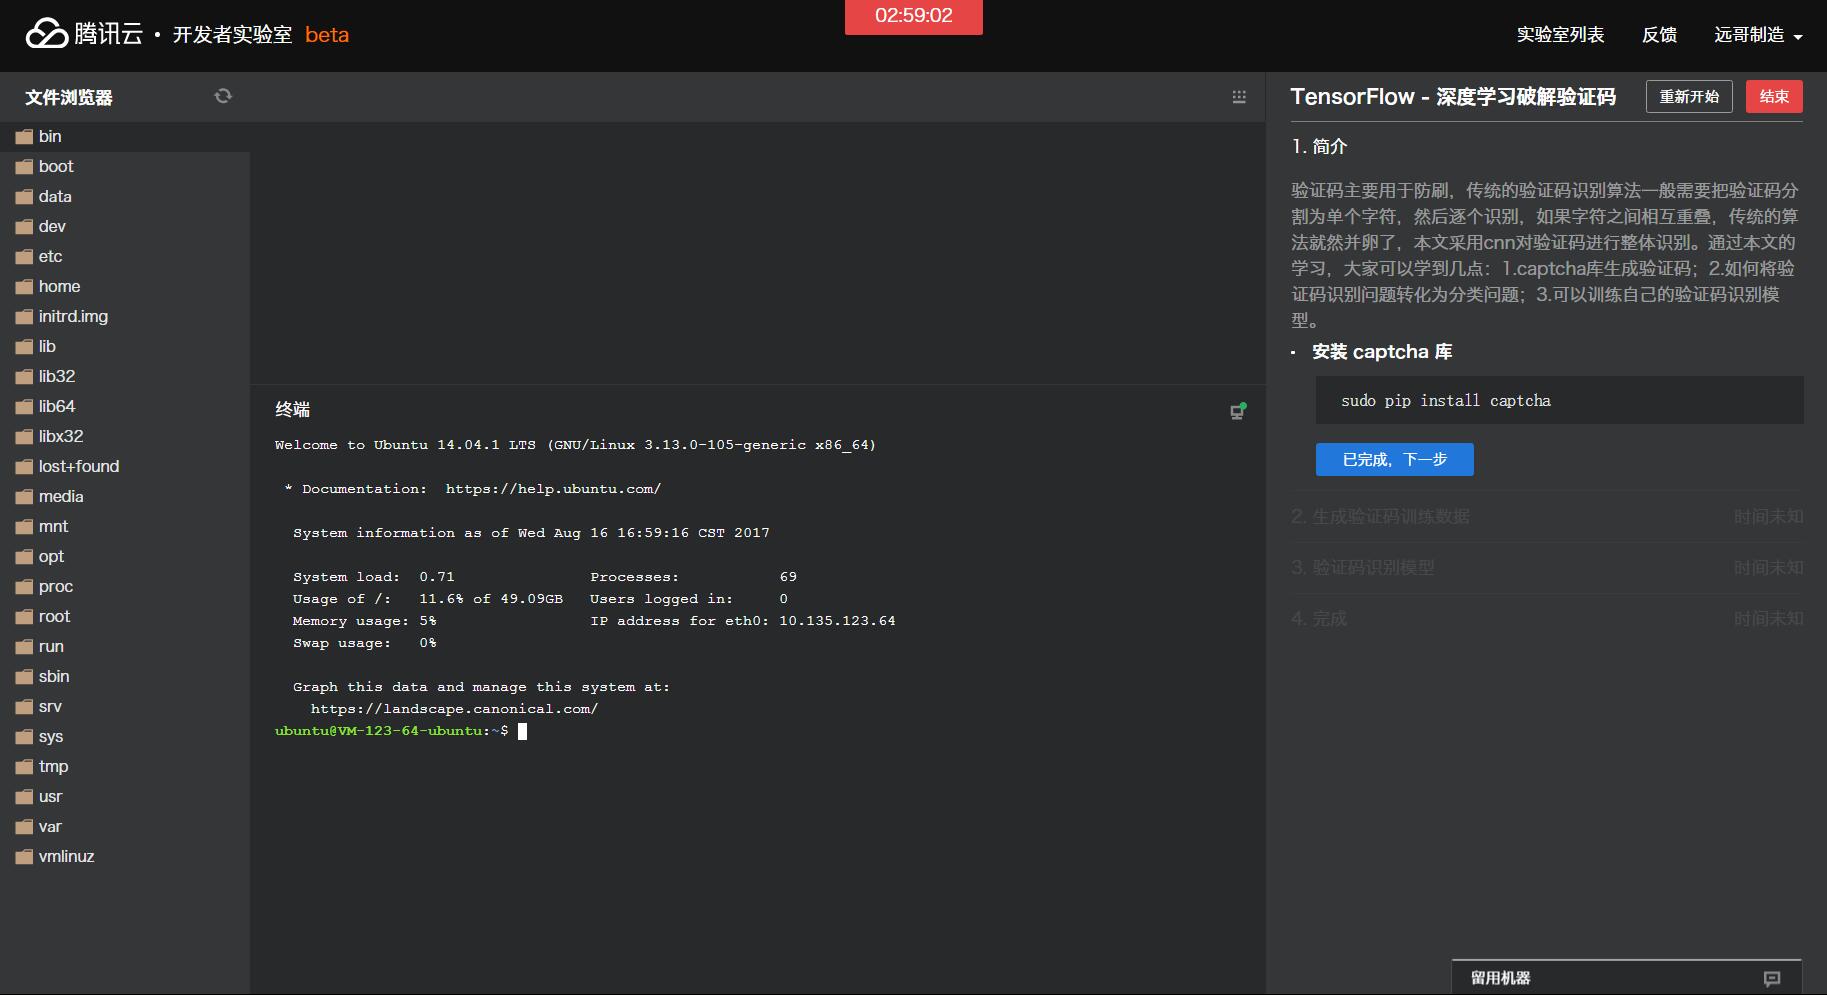
验证码主要用于防刷,传统的验证码识别算法一般需要把验证码分割为单个字符,然后逐个识别,如果字符之间相互重叠,传统的算法就然并卵了,本文采用cnn对验证码进行整体识别。通过本文的学习,大家可以学到几点:1.captcha库生成验证码;2.如何将验证码识别问题转化为分类问题;3.可以训练自己的验证码识别模型。

1.1 安装captcha

sudo pip install captcha

1
2
3
4
5
6
7
8
9
10
11
12
13
14
15
16
17
18
19
20
21
22
Welcome to Ubuntu 14.04.1 LTS (GNU/Linux 3.13.0-105-generic x86_64)

* Documentation: https://help.ubuntu.com/

System information as of Wed Aug 16 16:59:16 CST 2017

System load: 0.71 Processes: 69
Usage of /: 11.6% of 49.09GB Users logged in: 0
Memory usage: 5% IP address for eth0: 10.135.123.64
Swap usage: 0%

Graph this data and manage this system at:
https://landscape.canonical.com/

ubuntu@VM-123-64-ubuntu:~$ sudo pip install captcha
Downloading/unpacking captcha
Downloading captcha-0.2.4-py2-none-any.whl (103kB): 103kB downloaded
Requirement already satisfied (use --upgrade to upgrade): Pillow in /usr/local/lib/python2.7/dist-packages(from captcha)
Requirement already satisfied (use --upgrade to upgrade): olefile in /usr/local/lib/python2.7/dist-packages (from Pillow->captcha)
Installing collected packages: captcha
Successfully installed captcha
Cleaning up...

2.0 生成验证码训练数据

所有的模型训练,数据是王道,本文采用captcha库生成验证码,captcha可以生成语音和图片验证码,我们采用生成图片验证码功能,验证码是由数字、大写字母、小写字母组成(当然你也可以根据自己的需求调整,比如添加一些特殊字符),长度为4,所以总共有62^4种组合验证码。

2.1 验证码生成器

采用python中生成器方式来生成我们的训练数据,这样的好处是,不需要提前生成大量的数据,训练过程中生成数据,并且可以无限生成数据。
现在您可以在/home/ubuntu目录下创建源文件generate_captcha.py,内容可参考:

1
2
3
4
5
6
7
8
9
10
11
12
13
14
15
16
17
18
19
20
21
22
23
24
25
26
27
28
29
30
31
32
33
34
35
36
37
38
39
40
41
42
43
44
45
46
47
48
49
50
#!/usr/bin/python
# -*- coding: utf-8 -*

from captcha.image import ImageCaptcha
from PIL import Image
import numpy as np
import random
import string

class generateCaptcha():
def __init__(self,
width = 160,#验证码图片的宽
height = 60,#验证码图片的高
char_num = 4,#验证码字符个数
characters = string.digits + string.ascii_uppercase + string.ascii_lowercase):#验证码组成,数字+大写字母+小写字母
self.width = width
self.height = height
self.char_num = char_num
self.characters = characters
self.classes = len(characters)

def gen_captcha(self,batch_size = 50):
X = np.zeros([batch_size,self.height,self.width,1])
img = np.zeros((self.height,self.width),dtype=np.uint8)
Y = np.zeros([batch_size,self.char_num,self.classes])
image = ImageCaptcha(width = self.width,height = self.height)

while True:
for i in range(batch_size):
captcha_str = ''.join(random.sample(self.characters,self.char_num))
img = image.generate_image(captcha_str).convert('L')
img = np.array(img.getdata())
X[i] = np.reshape(img,[self.height,self.width,1])/255.0
for j,ch in enumerate(captcha_str):
Y[i,j,self.characters.find(ch)] = 1
Y = np.reshape(Y,(batch_size,self.char_num*self.classes))
yield X,Y

def decode_captcha(self,y):
y = np.reshape(y,(len(y),self.char_num,self.classes))
return ''.join(self.characters[x] for x in np.argmax(y,axis = 2)[0,:])

def get_parameter(self):
return self.width,self.height,self.char_num,self.characters,self.classes

def gen_test_captcha(self):
image = ImageCaptcha(width = self.width,height = self.height)
captcha_str = ''.join(random.sample(self.characters,self.char_num))
img = image.generate_image(captcha_str)
img.save(captcha_str + '.jpg!webp')

然后执行:
cd /home/ubuntu
python
import generate_captcha
g = generate_captcha.generateCaptcha()
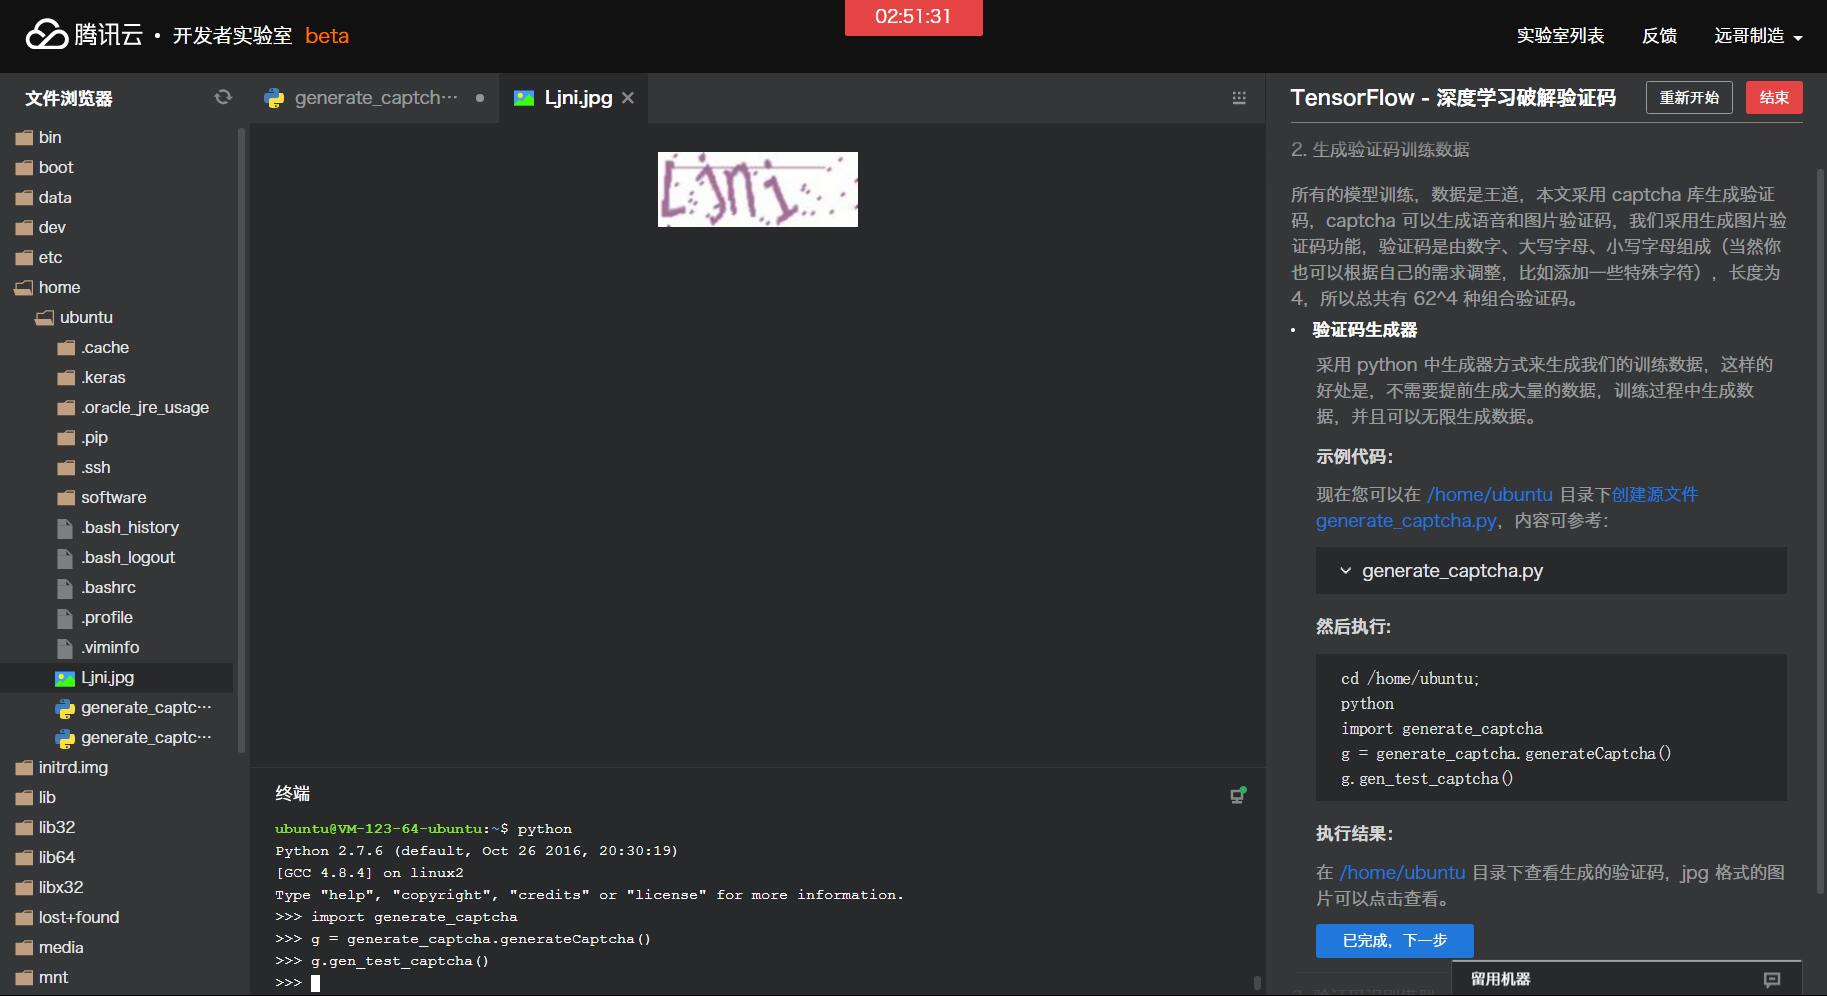
g.gen_test_captcha()
执行结果:
/home/ubuntu目录下查看生成的验证码,jpg格式的图片可以点击查看。
3.0 验证码识别模型

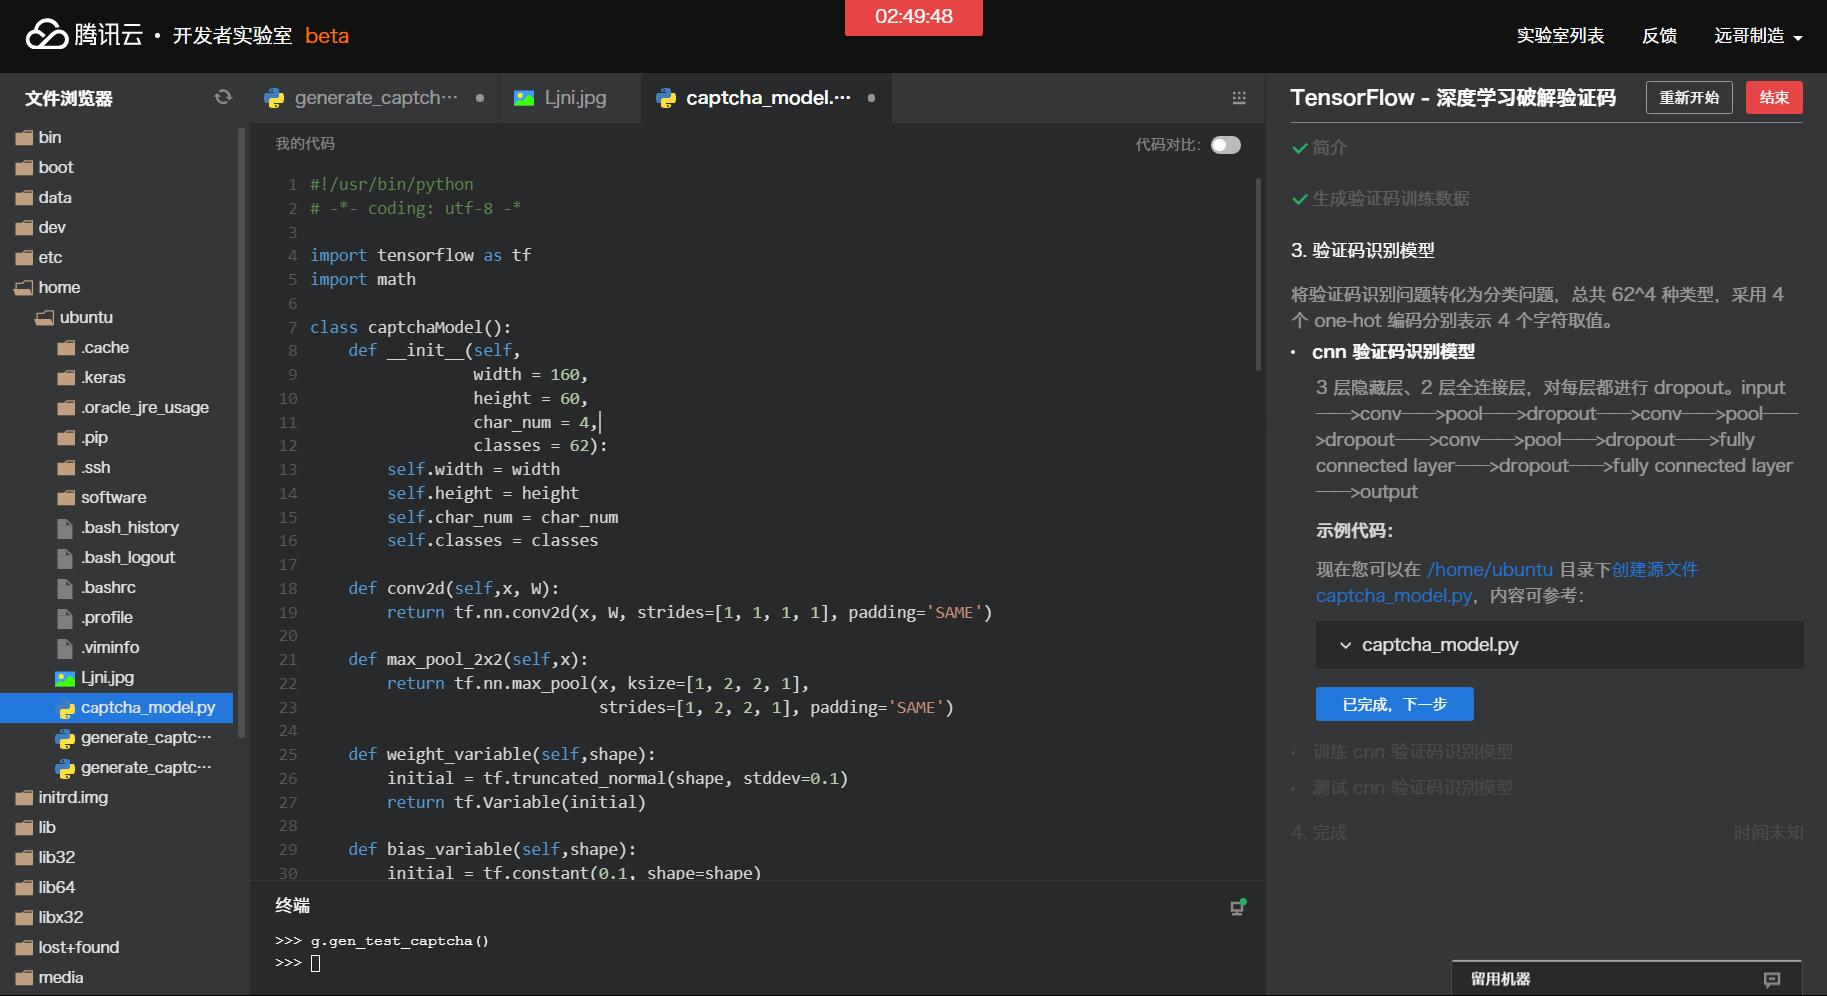
将验证码识别问题转化为分类问题,总共62^4种类型,采用4one-hot编码分别表示4个字符取值。
cnn验证码识别模型
3层隐藏层、2层全连接层,对每层都进行dropoutinput——>conv——>pool——>dropout——>conv——>pool——>dropout——>conv——>pool——>dropout——>fully connected layer——>dropout——>fully connected layer——>output

现在您可以在/home/ubuntu目录下创建源文件captcha_model.py,内容可参考:

1
2
3
4
5
6
7
8
9
10
11
12
13
14
15
16
17
18
19
20
21
22
23
24
25
26
27
28
29
30
31
32
33
34
35
36
37
38
39
40
41
42
43
44
45
46
47
48
49
50
51
52
53
54
55
56
57
58
59
60
61
62
63
64
65
66
67
68
69
70
71
72
73
74
75
#!/usr/bin/python
# -*- coding: utf-8 -*

import tensorflow as tf
import math

class captchaModel():
def __init__(self,
width = 160,
height = 60,
char_num = 4,
classes = 62):
self.width = width
self.height = height
self.char_num = char_num
self.classes = classes

def conv2d(self,x, W):
return tf.nn.conv2d(x, W, strides=[1, 1, 1, 1], padding='SAME')

def max_pool_2x2(self,x):
return tf.nn.max_pool(x, ksize=[1, 2, 2, 1],
strides=[1, 2, 2, 1], padding='SAME')

def weight_variable(self,shape):
initial = tf.truncated_normal(shape, stddev=0.1)
return tf.Variable(initial)

def bias_variable(self,shape):
initial = tf.constant(0.1, shape=shape)
return tf.Variable(initial)

def create_model(self,x_images,keep_prob):
#first layer
w_conv1 = self.weight_variable([5, 5, 1, 32])
b_conv1 = self.bias_variable([32])
h_conv1 = tf.nn.relu(tf.nn.bias_add(self.conv2d(x_images, w_conv1), b_conv1))
h_pool1 = self.max_pool_2x2(h_conv1)
h_dropout1 = tf.nn.dropout(h_pool1,keep_prob)
conv_width = math.ceil(self.width/2)
conv_height = math.ceil(self.height/2)

#second layer
w_conv2 = self.weight_variable([5, 5, 32, 64])
b_conv2 = self.bias_variable([64])
h_conv2 = tf.nn.relu(tf.nn.bias_add(self.conv2d(h_dropout1, w_conv2), b_conv2))
h_pool2 = self.max_pool_2x2(h_conv2)
h_dropout2 = tf.nn.dropout(h_pool2,keep_prob)
conv_width = math.ceil(conv_width/2)
conv_height = math.ceil(conv_height/2)

#third layer
w_conv3 = self.weight_variable([5, 5, 64, 64])
b_conv3 = self.bias_variable([64])
h_conv3 = tf.nn.relu(tf.nn.bias_add(self.conv2d(h_dropout2, w_conv3), b_conv3))
h_pool3 = self.max_pool_2x2(h_conv3)
h_dropout3 = tf.nn.dropout(h_pool3,keep_prob)
conv_width = math.ceil(conv_width/2)
conv_height = math.ceil(conv_height/2)

#first fully layer
conv_width = int(conv_width)
conv_height = int(conv_height)
w_fc1 = self.weight_variable([64*conv_width*conv_height,1024])
b_fc1 = self.bias_variable([1024])
h_dropout3_flat = tf.reshape(h_dropout3,[-1,64*conv_width*conv_height])
h_fc1 = tf.nn.relu(tf.nn.bias_add(tf.matmul(h_dropout3_flat, w_fc1), b_fc1))
h_fc1_drop = tf.nn.dropout(h_fc1, keep_prob)

#second fully layer
w_fc2 = self.weight_variable([1024,self.char_num*self.classes])
b_fc2 = self.bias_variable([self.char_num*self.classes])
y_conv = tf.add(tf.matmul(h_fc1_drop, w_fc2), b_fc2)

return y_conv

3.1 训练cnn验证码识别模型

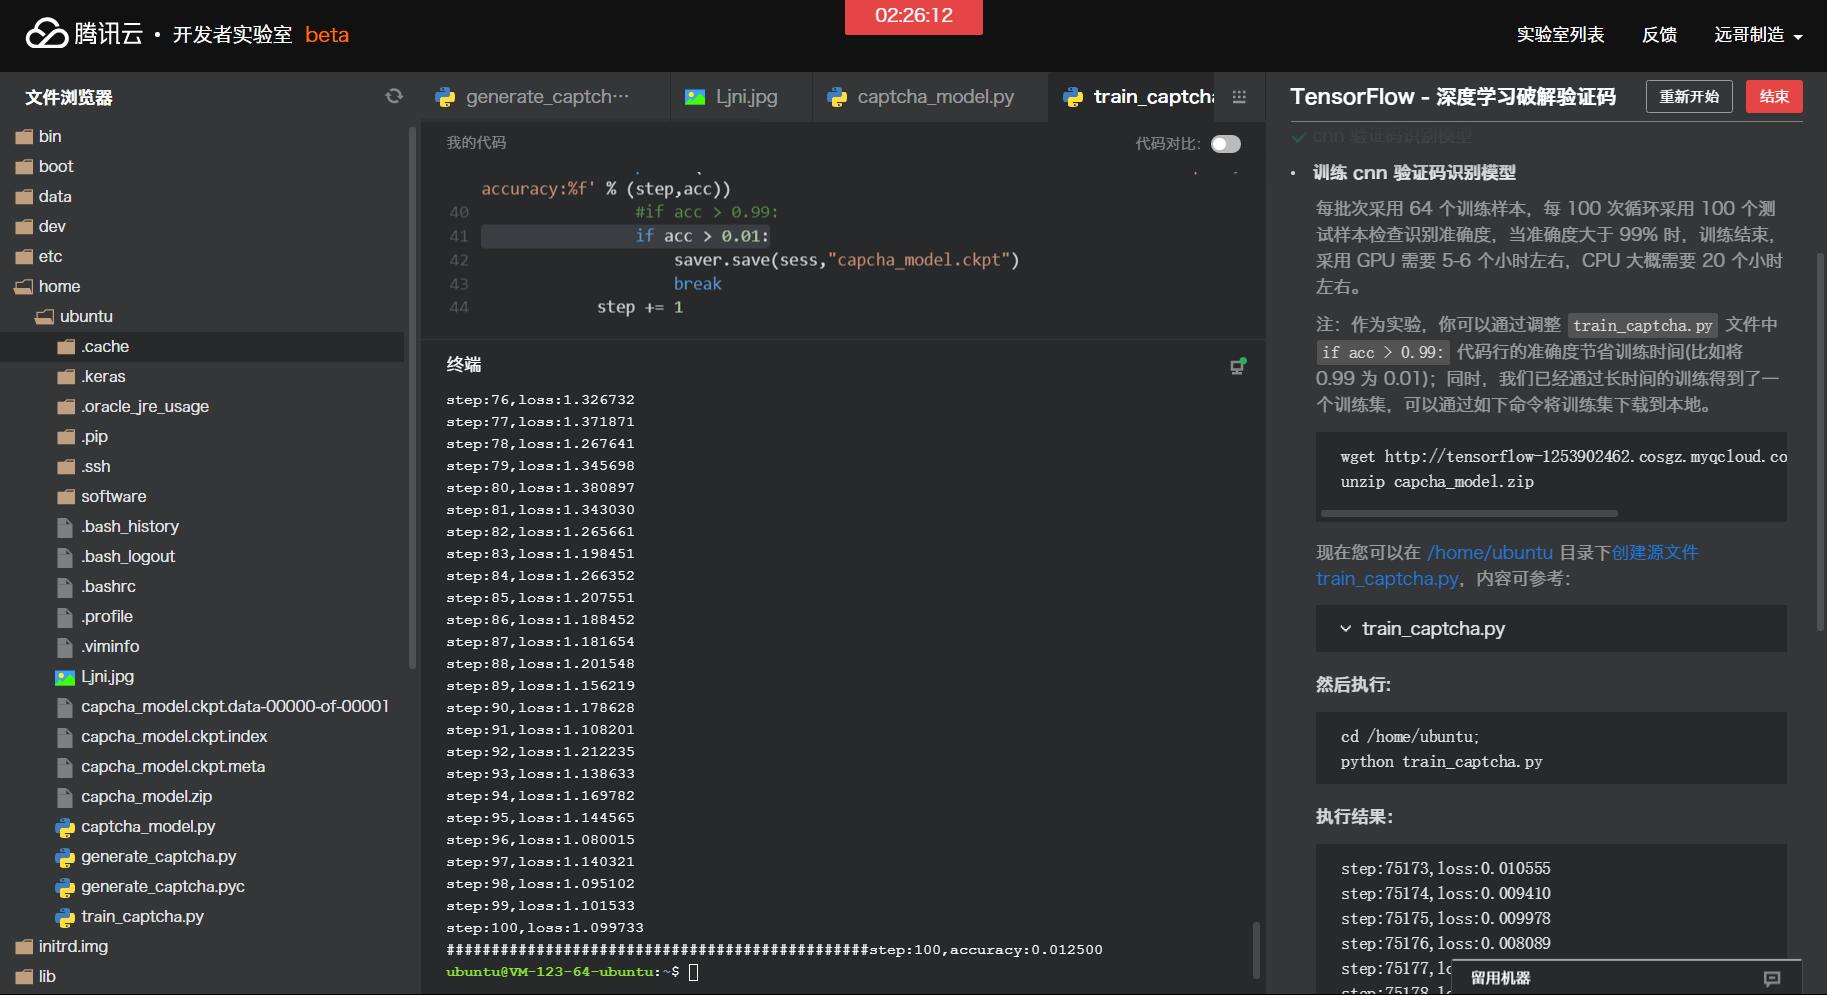
每批次采用64个训练样本,每100次循环采用100个测试样本检查识别准确度,当准确度大于99%时,训练结束,采用GPU需要5-6个小时左右,CPU大概需要20个小时左右。
注:作为实验,你可以通过调整train_captcha.py文件中if acc > 0.99:代码行的准确度节省训练时间(比如将0.990.01);同时,我们已经通过长时间的训练得到了一个训练集,可以通过如下命令将训练集下载到本地。
wget http://tensorflow-1253902462.cosgz.myqcloud.com/captcha/capcha_model.zip
unzip capcha_model.zip
现在您可以在/home/ubuntu目录下创建源文件train_captcha.py,内容可参考:

1
2
3
4
5
6
7
8
9
10
11
12
13
14
15
16
17
18
19
20
21
22
23
24
25
26
27
28
29
30
31
32
33
34
35
36
37
38
39
40
41
42
43
44
#!/usr/bin/python

import tensorflow as tf
import numpy as np
import string
import generate_captcha
import captcha_model

if __name__ == '__main__':
captcha = generate_captcha.generateCaptcha()
width,height,char_num,characters,classes = captcha.get_parameter()

x = tf.placeholder(tf.float32, [None, height,width,1])
y_ = tf.placeholder(tf.float32, [None, char_num*classes])
keep_prob = tf.placeholder(tf.float32)

model = captcha_model.captchaModel(width,height,char_num,classes)
y_conv = model.create_model(x,keep_prob)
cross_entropy = tf.reduce_mean(tf.nn.sigmoid_cross_entropy_with_logits(labels=y_,logits=y_conv))
train_step = tf.train.AdamOptimizer(1e-4).minimize(cross_entropy)

predict = tf.reshape(y_conv, [-1,char_num, classes])
real = tf.reshape(y_,[-1,char_num, classes])
correct_prediction = tf.equal(tf.argmax(predict,2), tf.argmax(real,2))
correct_prediction = tf.cast(correct_prediction, tf.float32)
accuracy = tf.reduce_mean(correct_prediction)

saver = tf.train.Saver()
with tf.Session() as sess:
sess.run(tf.global_variables_initializer())
step = 0
while True:
batch_x,batch_y = next(captcha.gen_captcha(64))
_,loss = sess.run([train_step,cross_entropy],feed_dict={x: batch_x, y_: batch_y, keep_prob: 0.75})
print ('step:%d,loss:%f' % (step,loss))
if step % 100 == 0:
batch_x_test,batch_y_test = next(captcha.gen_captcha(100))
acc = sess.run(accuracy, feed_dict={x: batch_x_test, y_: batch_y_test, keep_prob: 1.})
print ('###############################################step:%d,accuracy:%f' % (step,acc))
#if acc > 0.99:
if acc > 0.01:
saver.save(sess,"capcha_model.ckpt")
break
step += 1
1
2
3
4
5
6
7
8
9
10
11
12
13
14
15
16
17
18
19
20
21
22
23
24
25
26
27
28
29
30
31
32
33
34
35
36
37
38
39
40
41
42
43
44
45
46
47
48
49
50
51
52
53
54
55
56
57
58
59
60
61
62
63
64
65
66
67
68
69
70
71
72
73
74
75
76
77
78
79
80
81
82
83
84
85
86
87
88
89
90
91
92
93
94
95
96
97
98
99
100
101
102
103
104
105
106
107
108
109
110
111
112
113
114
115
116
117
118
119
120
121
122
123
124
125
126
127
128
ubuntu@VM-123-64-ubuntu:~$ cd /home/ubuntu;
ubuntu@VM-123-64-ubuntu:~$ python
Python 2.7.6 (default, Oct 26 2016, 20:30:19)
[GCC 4.8.4] on linux2
Type "help", "copyright", "credits" or "license" for more information.
>>> exit()
ubuntu@VM-123-64-ubuntu:~$ wget http://tensorflow-1253902462.cosgz.myqcloud.com/captcha/capcha_model.zip
--2017-08-17 08:34:17-- http://tensorflow-1253902462.cosgz.myqcloud.com/captcha/capcha_model.zip
Resolving tensorflow-1253902462.cosgz.myqcloud.com (tensorflow-1253902462.cosgz.myqcloud.com)... 10.59.222.139, 10.59.222.140, 10.59.224.23, ...
Connecting to tensorflow-1253902462.cosgz.myqcloud.com (tensorflow-1253902462.cosgz.myqcloud.com)|10.59.222.139|:80... connected.
HTTP request sent, awaiting response... 200 OK
Length: 119460119 (114M) [application/zip]
Saving to: ‘capcha_model.zip

100%[=================================================================>] 119,460,119 15.9MB/s in 7.5s

2017-08-17 08:34:25 (15.2 MB/s) - ‘capcha_model.zip’ saved [119460119/119460119]

ubuntu@VM-123-64-ubuntu:~$ unzip capcha_model.zip
Archive: capcha_model.zip
inflating: capcha_model.ckpt.data-00000-of-00001
inflating: capcha_model.ckpt.index
inflating: capcha_model.ckpt.meta
```
```python
step:0,loss:50.325314
###############################################step:0,accuracy:0.010000
step:1,loss:43.411045
step:2,loss:35.461922
step:3,loss:30.740393
step:4,loss:25.651911
step:5,loss:21.852701
step:6,loss:18.238785
step:7,loss:15.623116
step:8,loss:12.930873
step:9,loss:11.302278
step:10,loss:9.714245
step:11,loss:8.534842
step:12,loss:7.268080
step:13,loss:6.742800
step:14,loss:6.121271
step:15,loss:5.694220
step:16,loss:4.978926
step:17,loss:4.716562
step:18,loss:4.378264
step:19,loss:3.976461
step:20,loss:3.853441
step:21,loss:3.679165
step:22,loss:3.387414
step:23,loss:3.391394
step:24,loss:2.966349
step:25,loss:2.982628
step:26,loss:2.803583
step:27,loss:2.705063
step:28,loss:2.569064
step:29,loss:2.581648
step:30,loss:2.514476
step:31,loss:2.508118
step:32,loss:2.318839
step:33,loss:2.272651
step:34,loss:2.220107
step:35,loss:2.345184
step:36,loss:2.195375
step:37,loss:2.048596
step:38,loss:2.115082
step:39,loss:2.134182
step:40,loss:2.090564
step:41,loss:1.996044
step:42,loss:2.004114
step:43,loss:2.000343
step:44,loss:1.876917
step:45,loss:1.821006
step:46,loss:1.757054
step:47,loss:1.891048
step:48,loss:1.764870
step:49,loss:1.677284
step:50,loss:1.698854
step:51,loss:1.590738
step:52,loss:1.790131
step:53,loss:1.710812
step:54,loss:1.691247
step:55,loss:1.629667
step:56,loss:1.571551
step:57,loss:1.575357
step:58,loss:1.659061
step:59,loss:1.614290
step:60,loss:1.623624
step:61,loss:1.569570
step:62,loss:1.545897
step:63,loss:1.516088
step:64,loss:1.552601
step:65,loss:1.527424
step:66,loss:1.424360
step:67,loss:1.462316
step:68,loss:1.476518
step:69,loss:1.412114
step:70,loss:1.336995
step:71,loss:1.363961
step:72,loss:1.385963
step:73,loss:1.360555
step:74,loss:1.388468
step:75,loss:1.294948
step:76,loss:1.326732
step:77,loss:1.371871
step:78,loss:1.267641
step:79,loss:1.345698
step:80,loss:1.380897
step:81,loss:1.343030
step:82,loss:1.265661
step:83,loss:1.198451
step:84,loss:1.266352
step:85,loss:1.207551
step:86,loss:1.188452
step:87,loss:1.181654
step:88,loss:1.201548
step:89,loss:1.156219
step:90,loss:1.178628
step:91,loss:1.108201
step:92,loss:1.212235
step:93,loss:1.138633
step:94,loss:1.169782
step:95,loss:1.144565
step:96,loss:1.080015
step:97,loss:1.140321
step:98,loss:1.095102
step:99,loss:1.101533
step:100,loss:1.099733
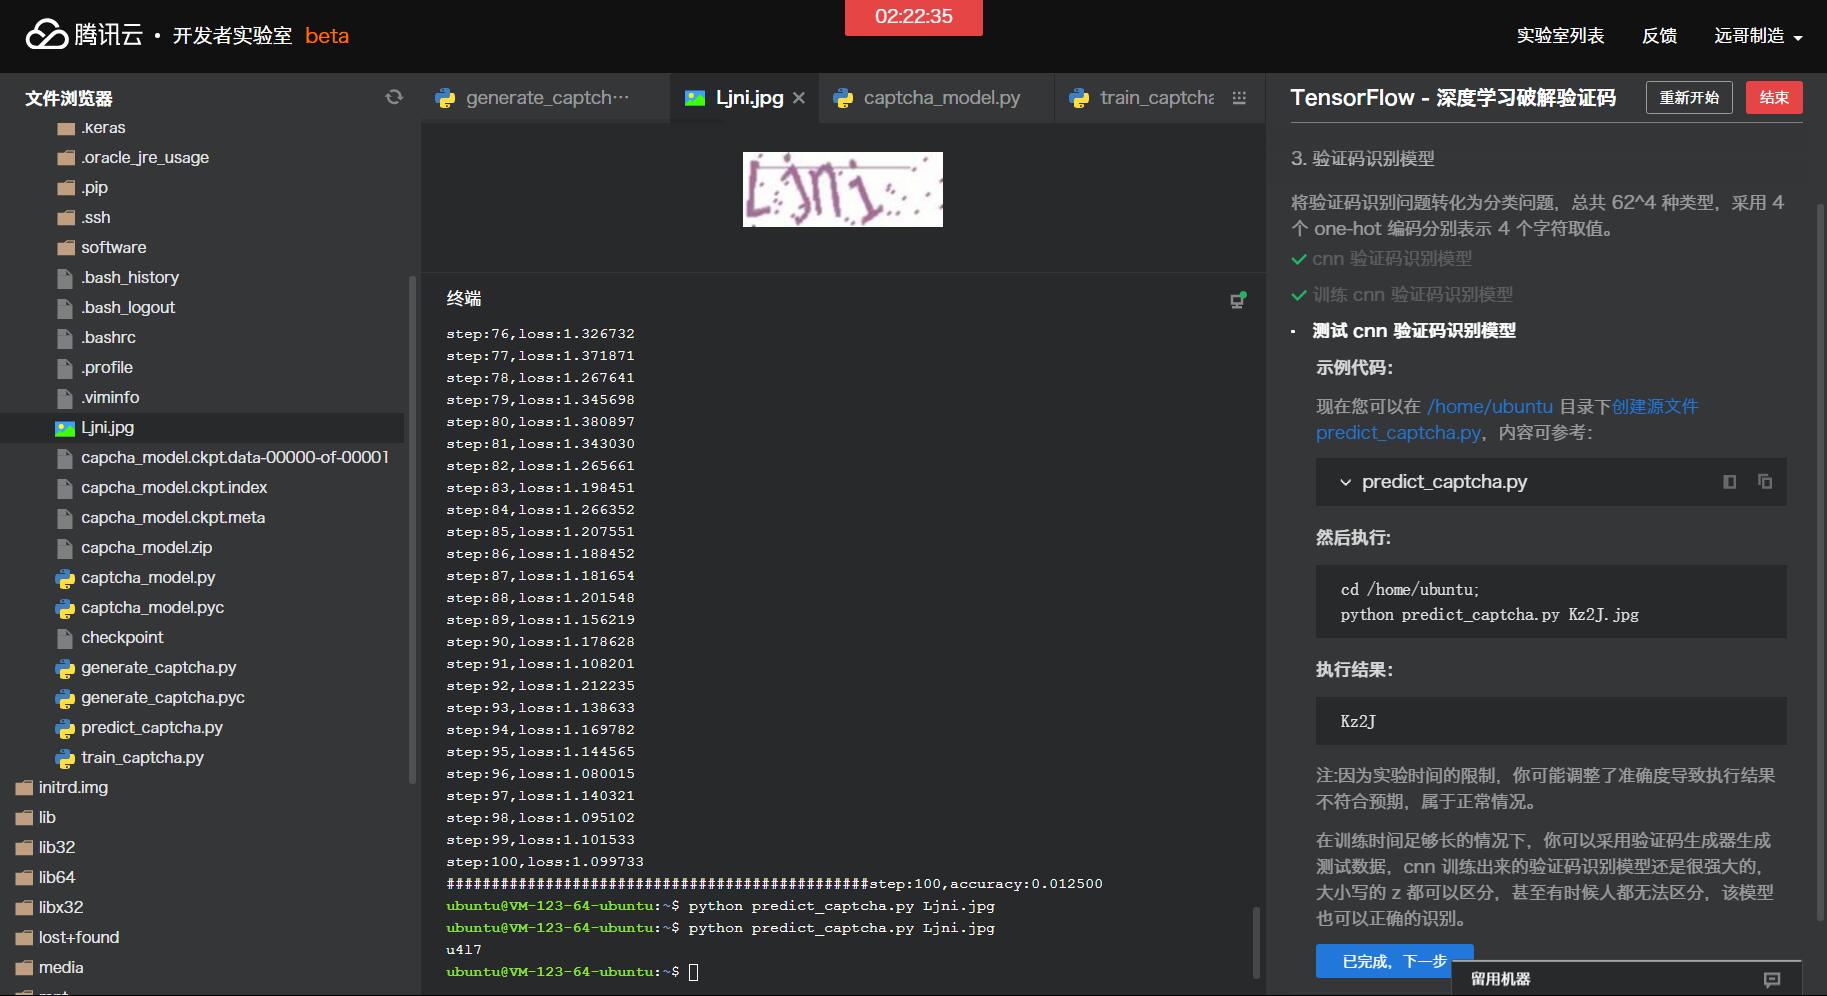
###############################################step:100,accuracy:0.012500

3.2 测试cnn验证码识别模型

1
2
3
4
5
6
7
8
9
10
11
12
13
14
15
16
17
18
19
20
21
22
23
24
25
26
27
28
29
30
31
32
33
34
35
#!/usr/bin/python

from PIL import Image, ImageFilter
import tensorflow as tf
import numpy as np
import string
import sys
import generate_captcha
import captcha_model

if __name__ == '__main__':
captcha = generate_captcha.generateCaptcha()
width,height,char_num,characters,classes = captcha.get_parameter()

gray_image = Image.open(sys.argv[1]).convert('L')
img = np.array(gray_image.getdata())
test_x = np.reshape(img,[height,width,1])/255.0
x = tf.placeholder(tf.float32, [None, height,width,1])
keep_prob = tf.placeholder(tf.float32)

model = captcha_model.captchaModel(width,height,char_num,classes)
y_conv = model.create_model(x,keep_prob)
predict = tf.argmax(tf.reshape(y_conv, [-1,char_num, classes]),2)
init_op = tf.global_variables_initializer()
saver = tf.train.Saver()
gpu_options = tf.GPUOptions(per_process_gpu_memory_fraction=0.95)
with tf.Session(config=tf.ConfigProto(log_device_placement=False,gpu_options=gpu_options)) as sess:
sess.run(init_op)
saver.restore(sess, "capcha_model.ckpt")
pre_list = sess.run(predict,feed_dict={x: [test_x], keep_prob: 1})
for i in pre_list:
s = ''
for j in i:
s += characters[j]
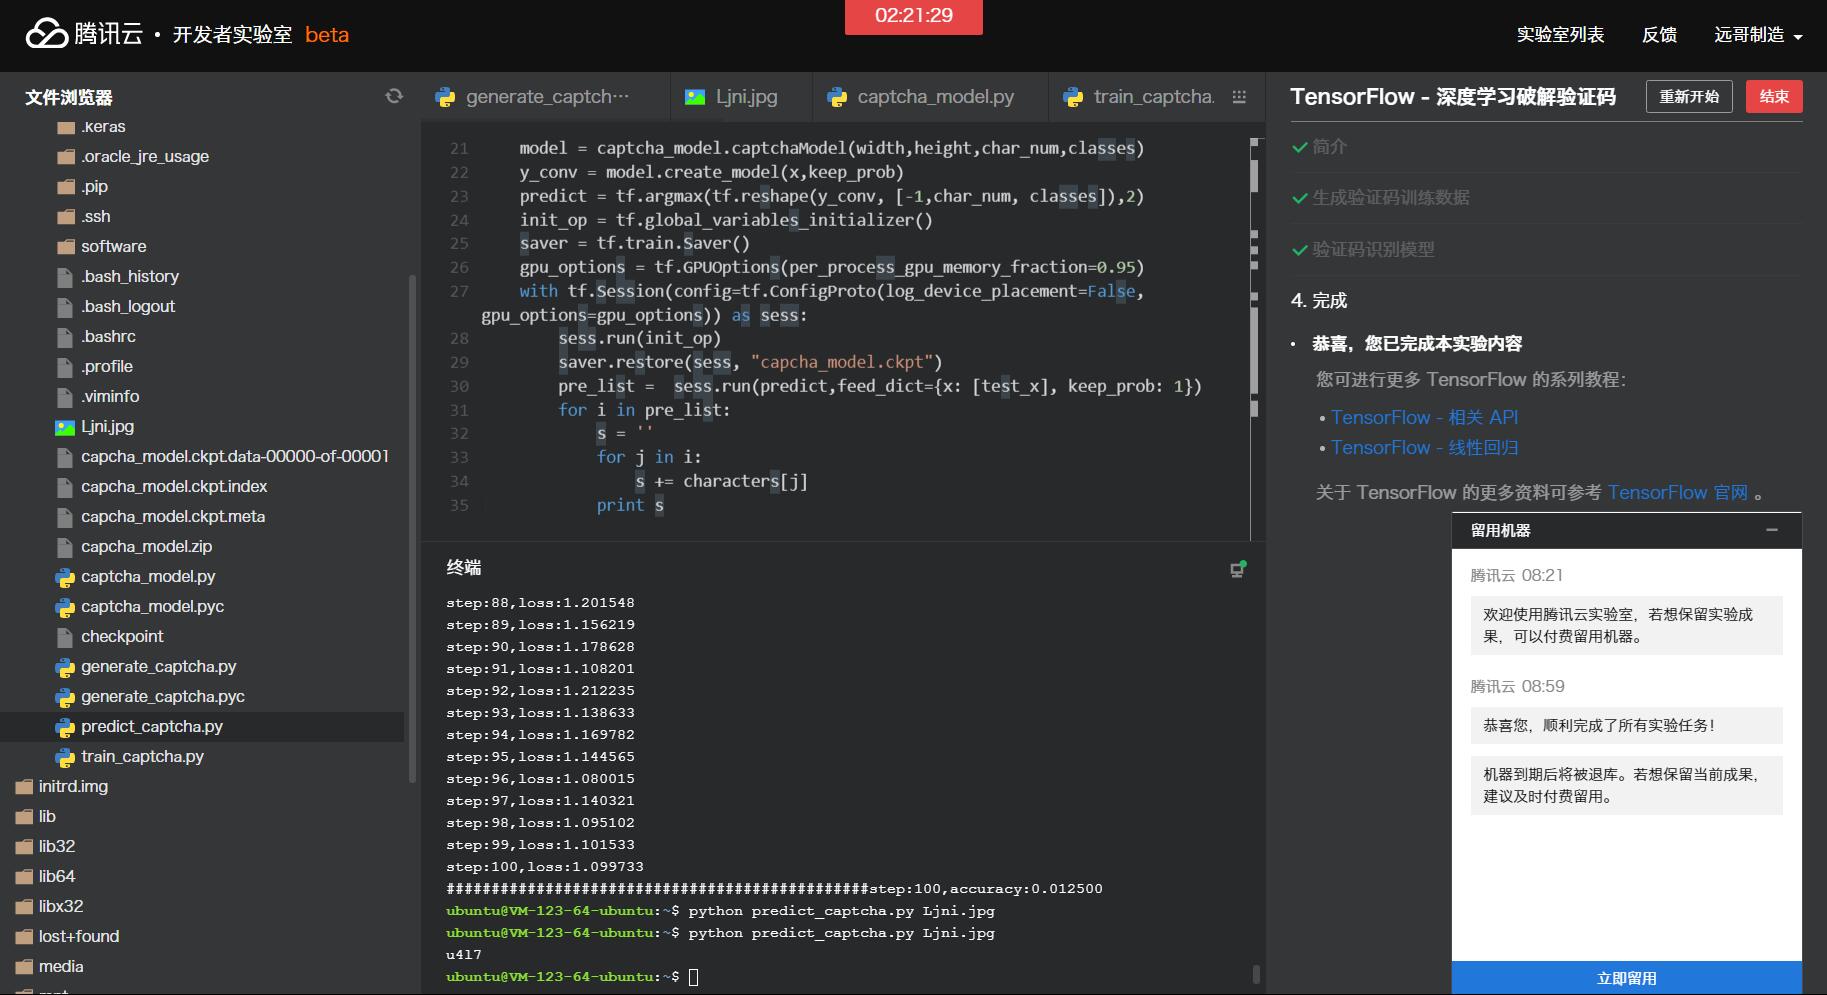
print s

现在您可以在/home/ubuntu目录下创建源文件predict_captcha.py,内容可参考:
predict_captcha.py
然后执行:
cd /home/ubuntu
python predict_captcha.py Kz2J.jpg!webp
执行结果:
Kz2J
注:因为实验时间的限制,你可能调整了准确度导致执行结果不符合预期,属于正常情况。
在训练时间足够长的情况下,你可以采用验证码生成器生成测试数据,cnn训练出来的验证码识别模型还是很强大的,大小写的z都可以区分,甚至有时候人都无法区分,该模型也可以正确的识别。
python predict_captcha.py Ljni.jpg!webp

1
u4l7

这就很尴尬了

0x02.后记

还剩点时间,那就继续跑吧……

1
2
3
4
5
6
7
8
step:2300,loss:0.091317
###############################################step:2300,accuracy:0.007500
step:2301,loss:0.090167

ubuntu@VM-123-64-ubuntu:~$ python predict_captcha.py U2Kw.jpg!webp
uPl7
ubuntu@VM-123-64-ubuntu:~$ python predict_captcha.py K1jZ.jpg!webp
59x7

还是很尴尬,一张也没有成功……
跟其他类似的实验室不同,代码可以直接复制,所以我全是复制的,然而到最后只是大体上走了个流程,代码注释较少
未完待续……